Back to Help Center

How To
How to Create a Sync Task
This guide outlines the step-by-step process for creating a file synchronization task between your local storage and another drive (external or remote storage) using the Sync application.
Last updated Jan 25, 2026
#how-to#drive#sync#guide
Prerequisites
- Ensure your desired cloud account (e.g., Dropbox, Google Drive) is already linked in the Drives section of the app.
- Ensure the app has permission to access your local file system.
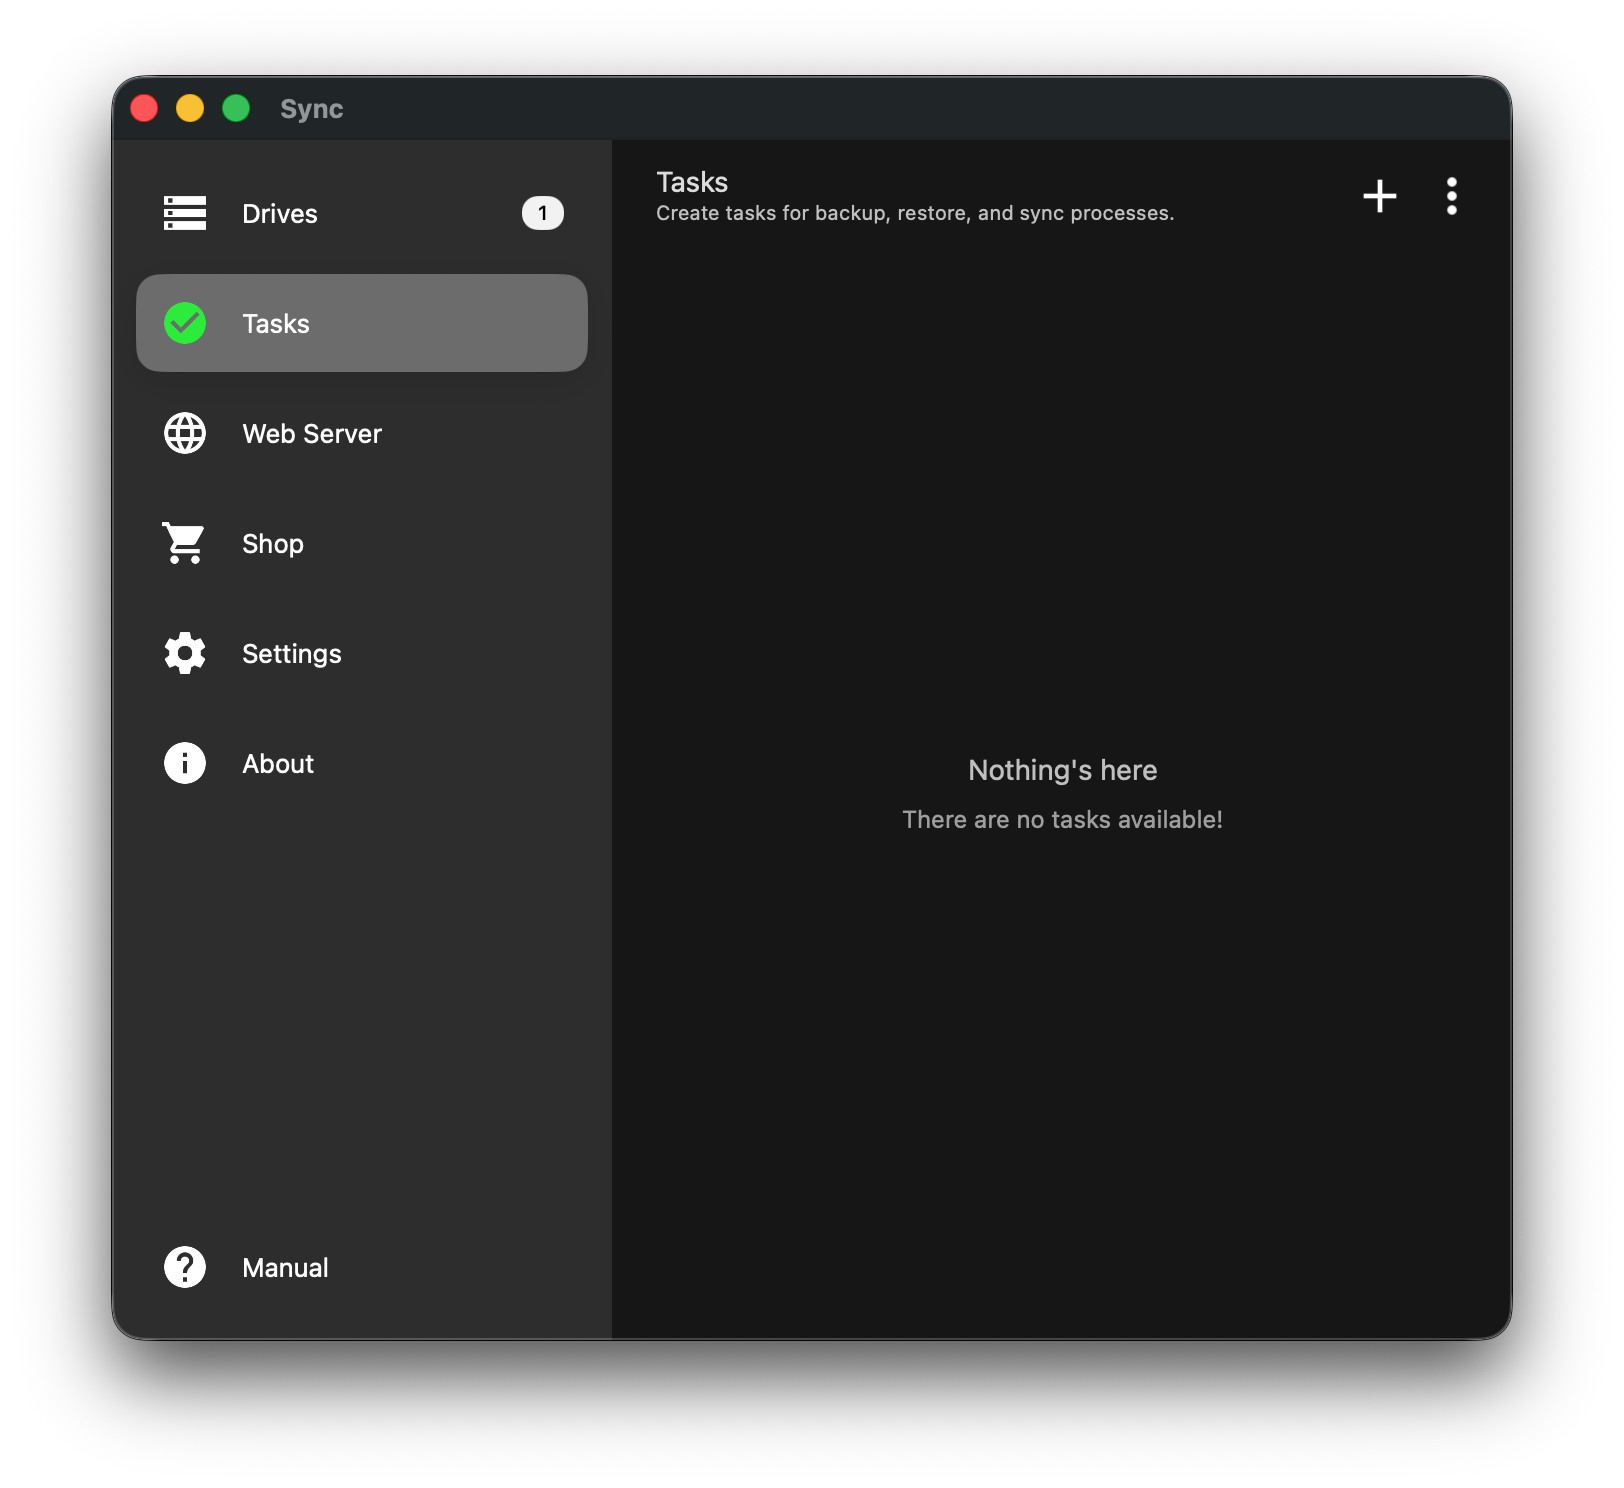
Step 1: Initiate a New Task
- Open the Sync application.
- Navigate to the Tasks tab on the left-hand sidebar.
- Click the Plus (+) icon located in the top right corner of the window.
Reference: Image 1
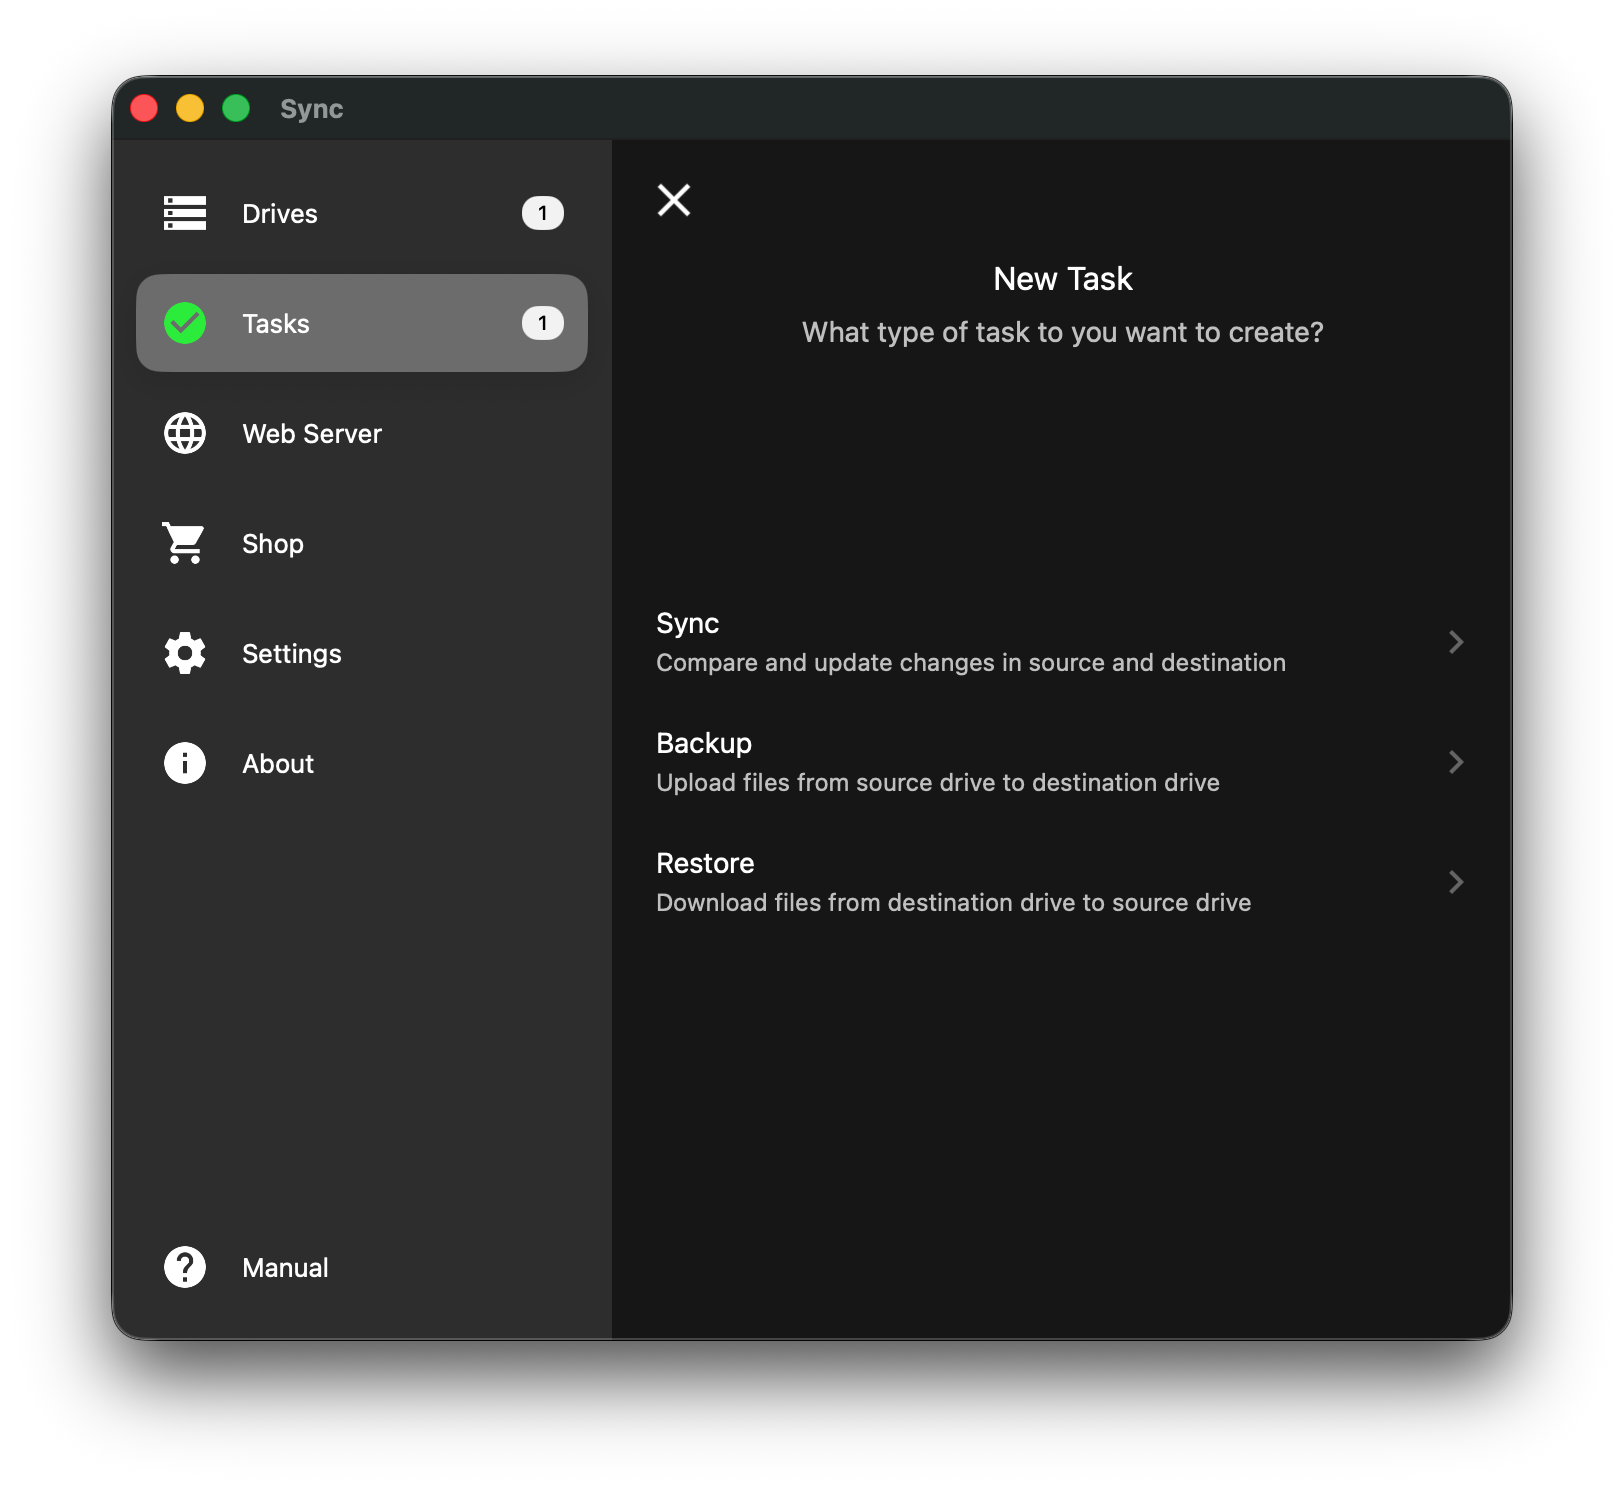
Step 2: Select Task Type
You will be presented with three options. For this tutorial, we will create a two-way synchronization.
- Sync: Compares and updates changes in both the source and destination. (Select this option).
- Backup: One-way transfer. Uploads files from source to destination.
- Restore: One-way transfer. Downloads files from destination to source.
Reference: Image 2
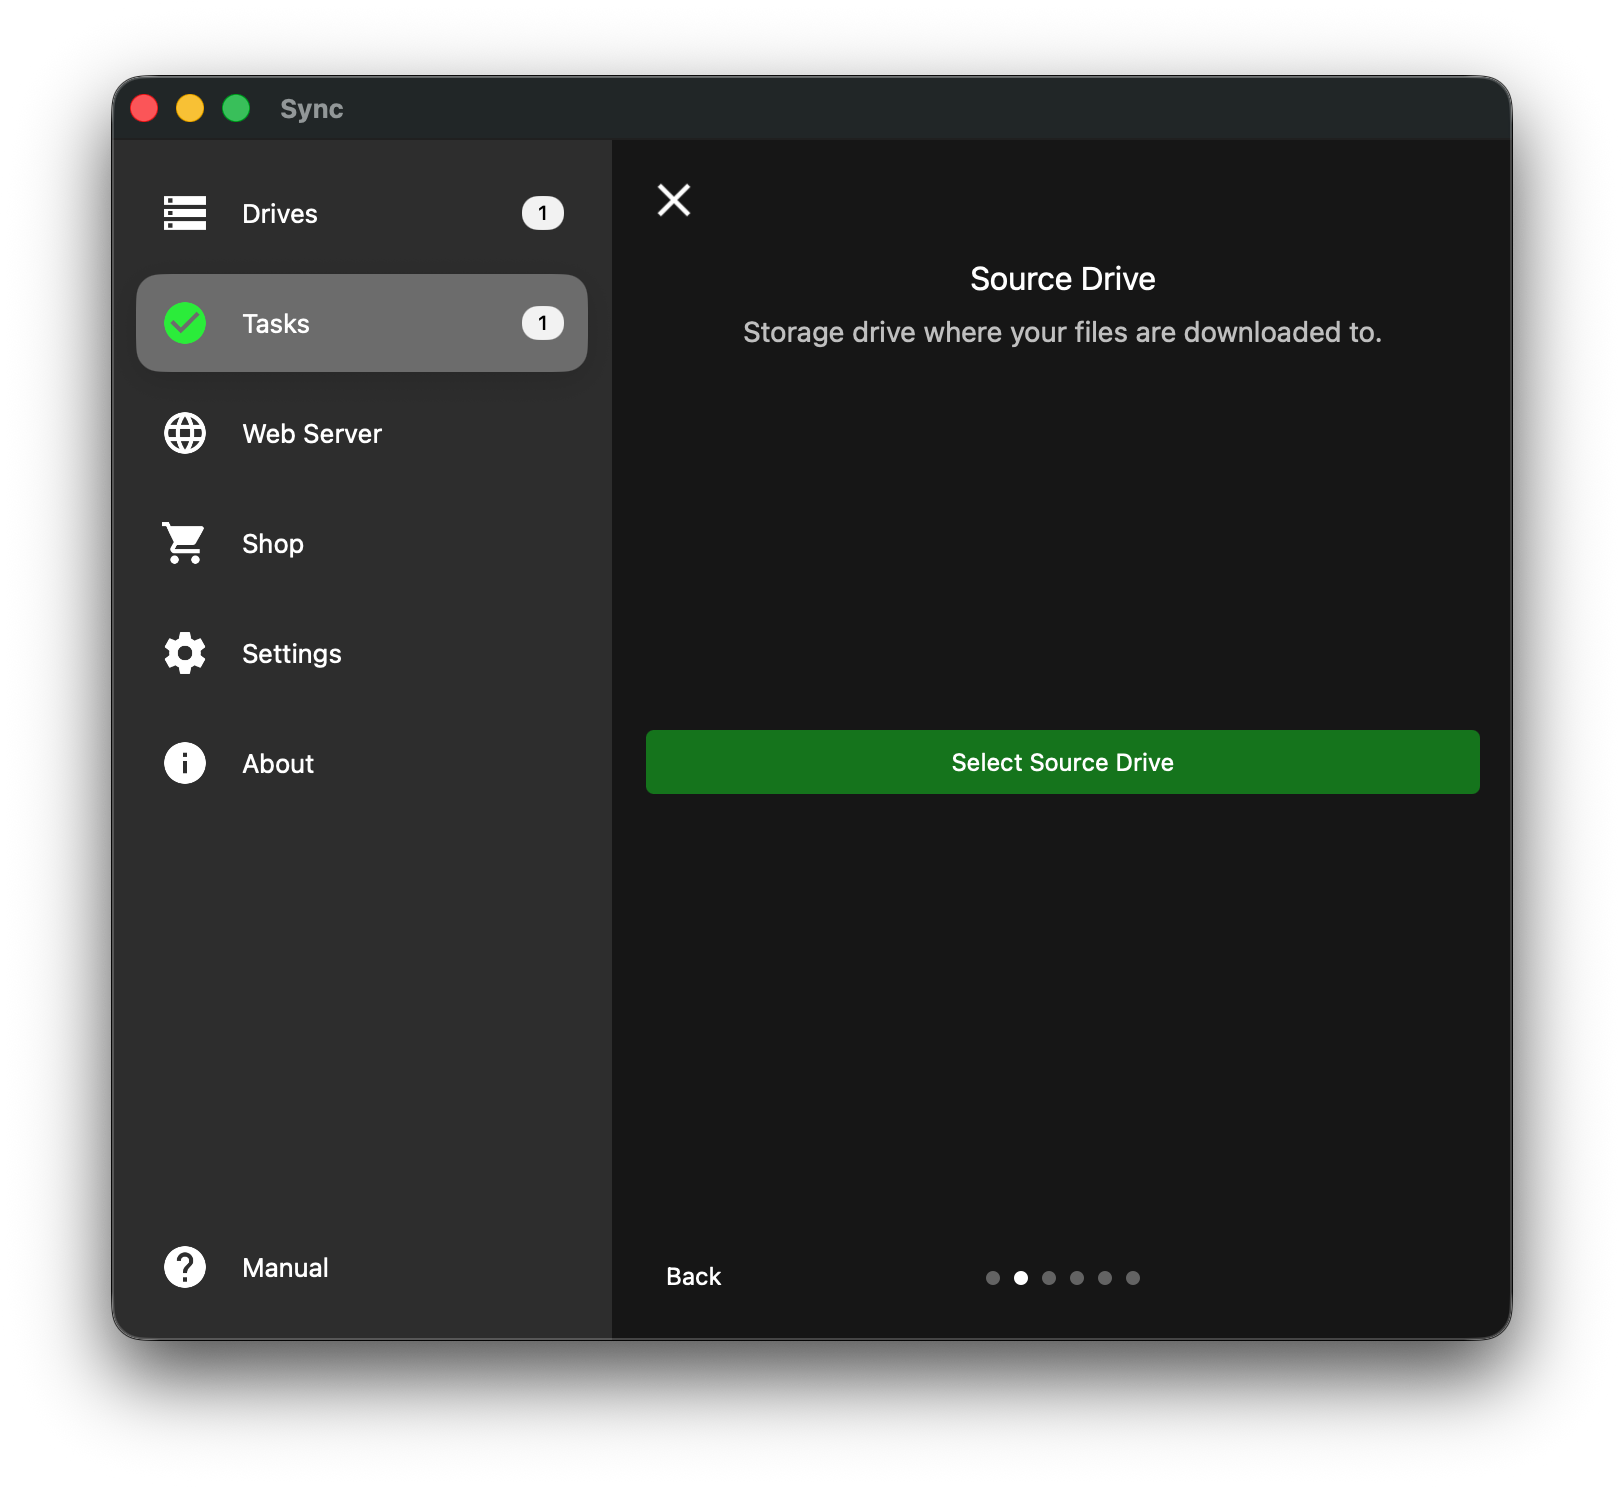
Step 3: Configure the Source Drive
- The app will ask for the Source Drive (where your files are currently located).
- Click the green Select Source Drive button.
- From the slide-out menu, select Local Drive to choose a folder on your computer.
- Note: Using an external USB drive as a source may require an upgrade.
Reference: Image 3
Step 4: Choose the Specific Folder
- A system file picker window will appear.
- Navigate to the folder you wish to sync.
- Select the folder and click Open/Save.
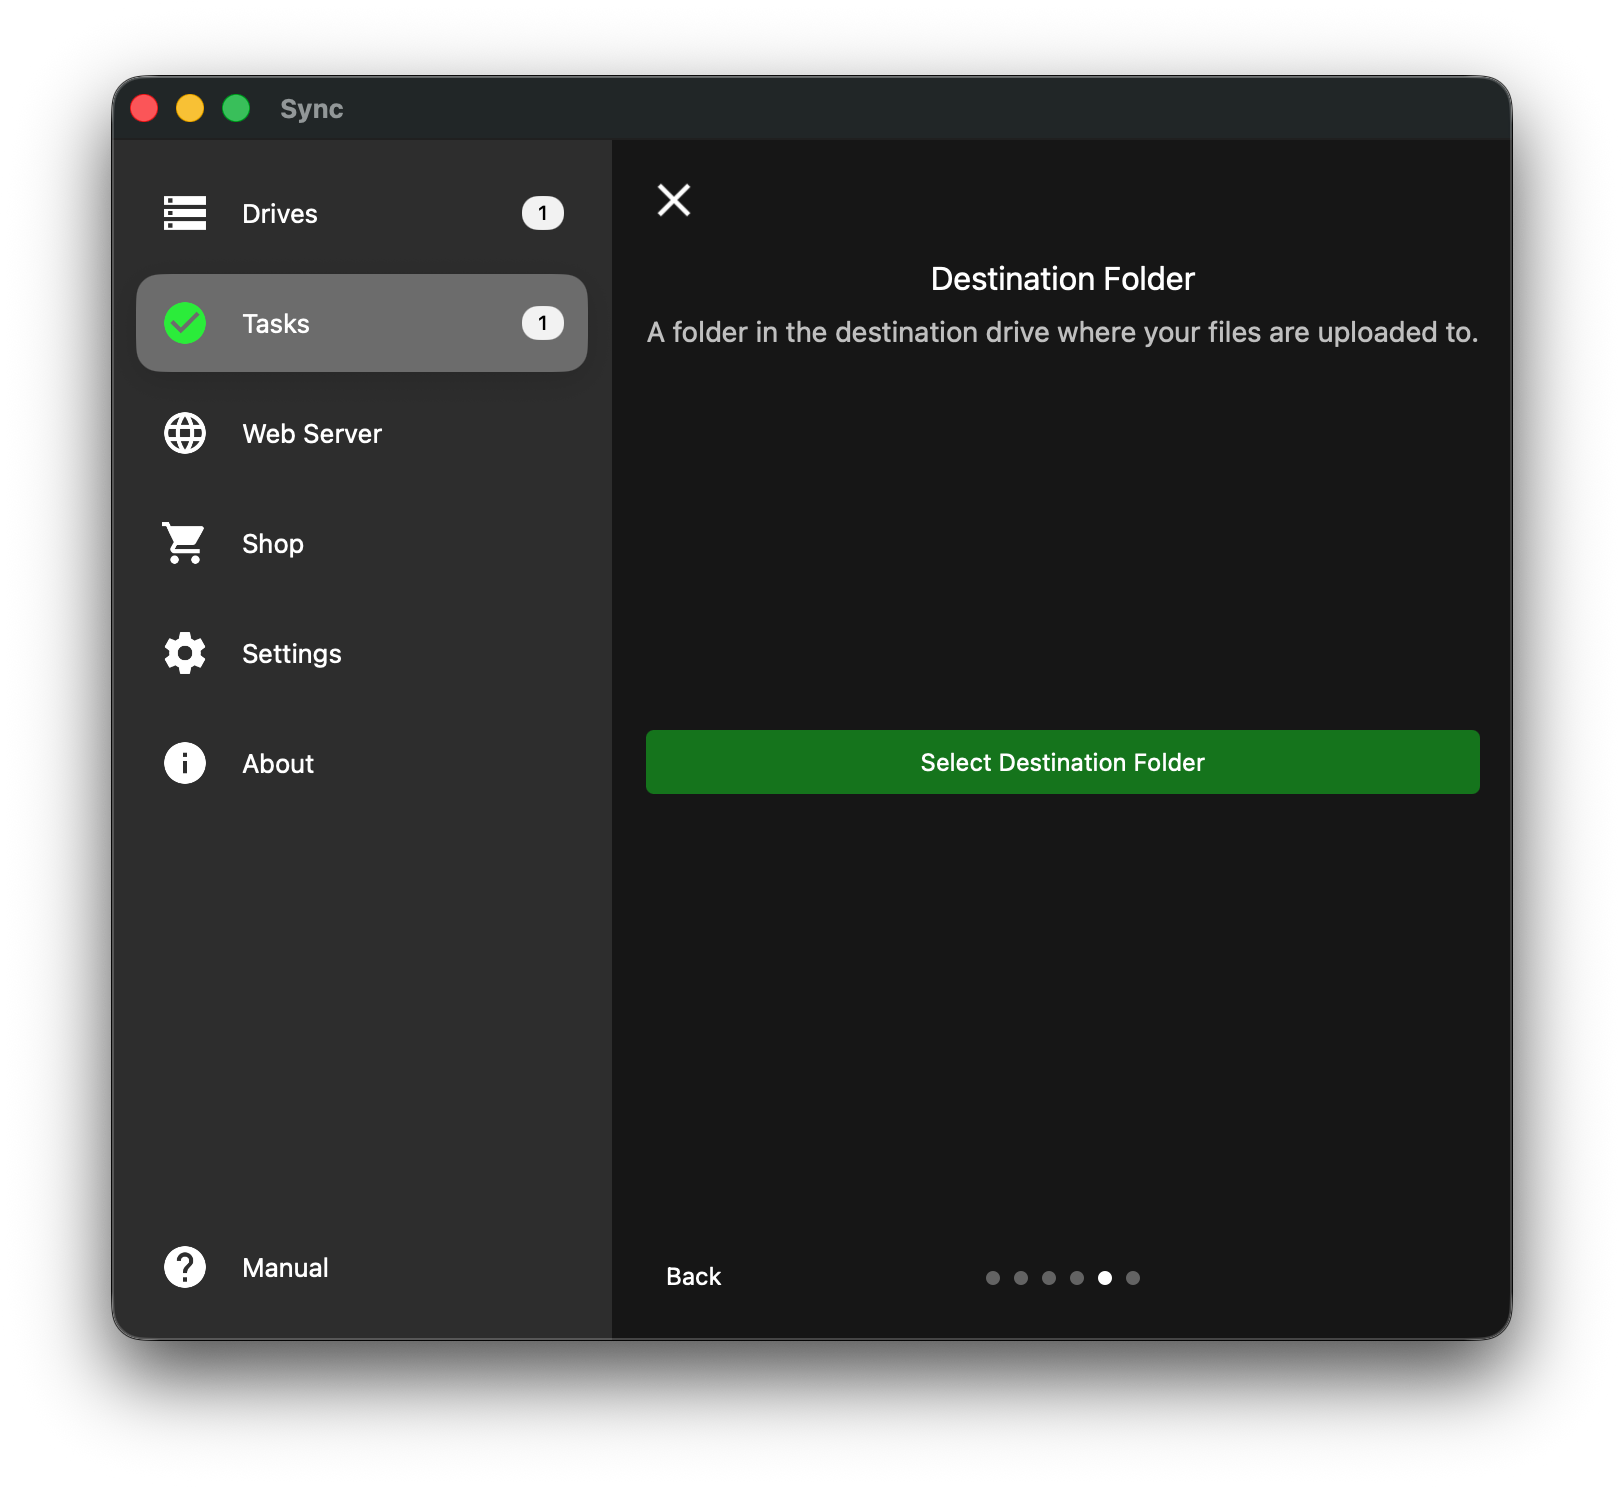
Step 5: Configure the Destination Drive
- The app will now ask for the Destination Drive (where you want the files to go).
- Click the green Select Destination Drive button.
- Select your connected cloud storage (e.g., Dropbox) from the list that appears.
Reference: Image 5
Step 6: Choose a Folder on the Destination Drive
- Navigate to the folder you wish to sync to.
- Select the folder and click Open/Save.
Reference: Image 6
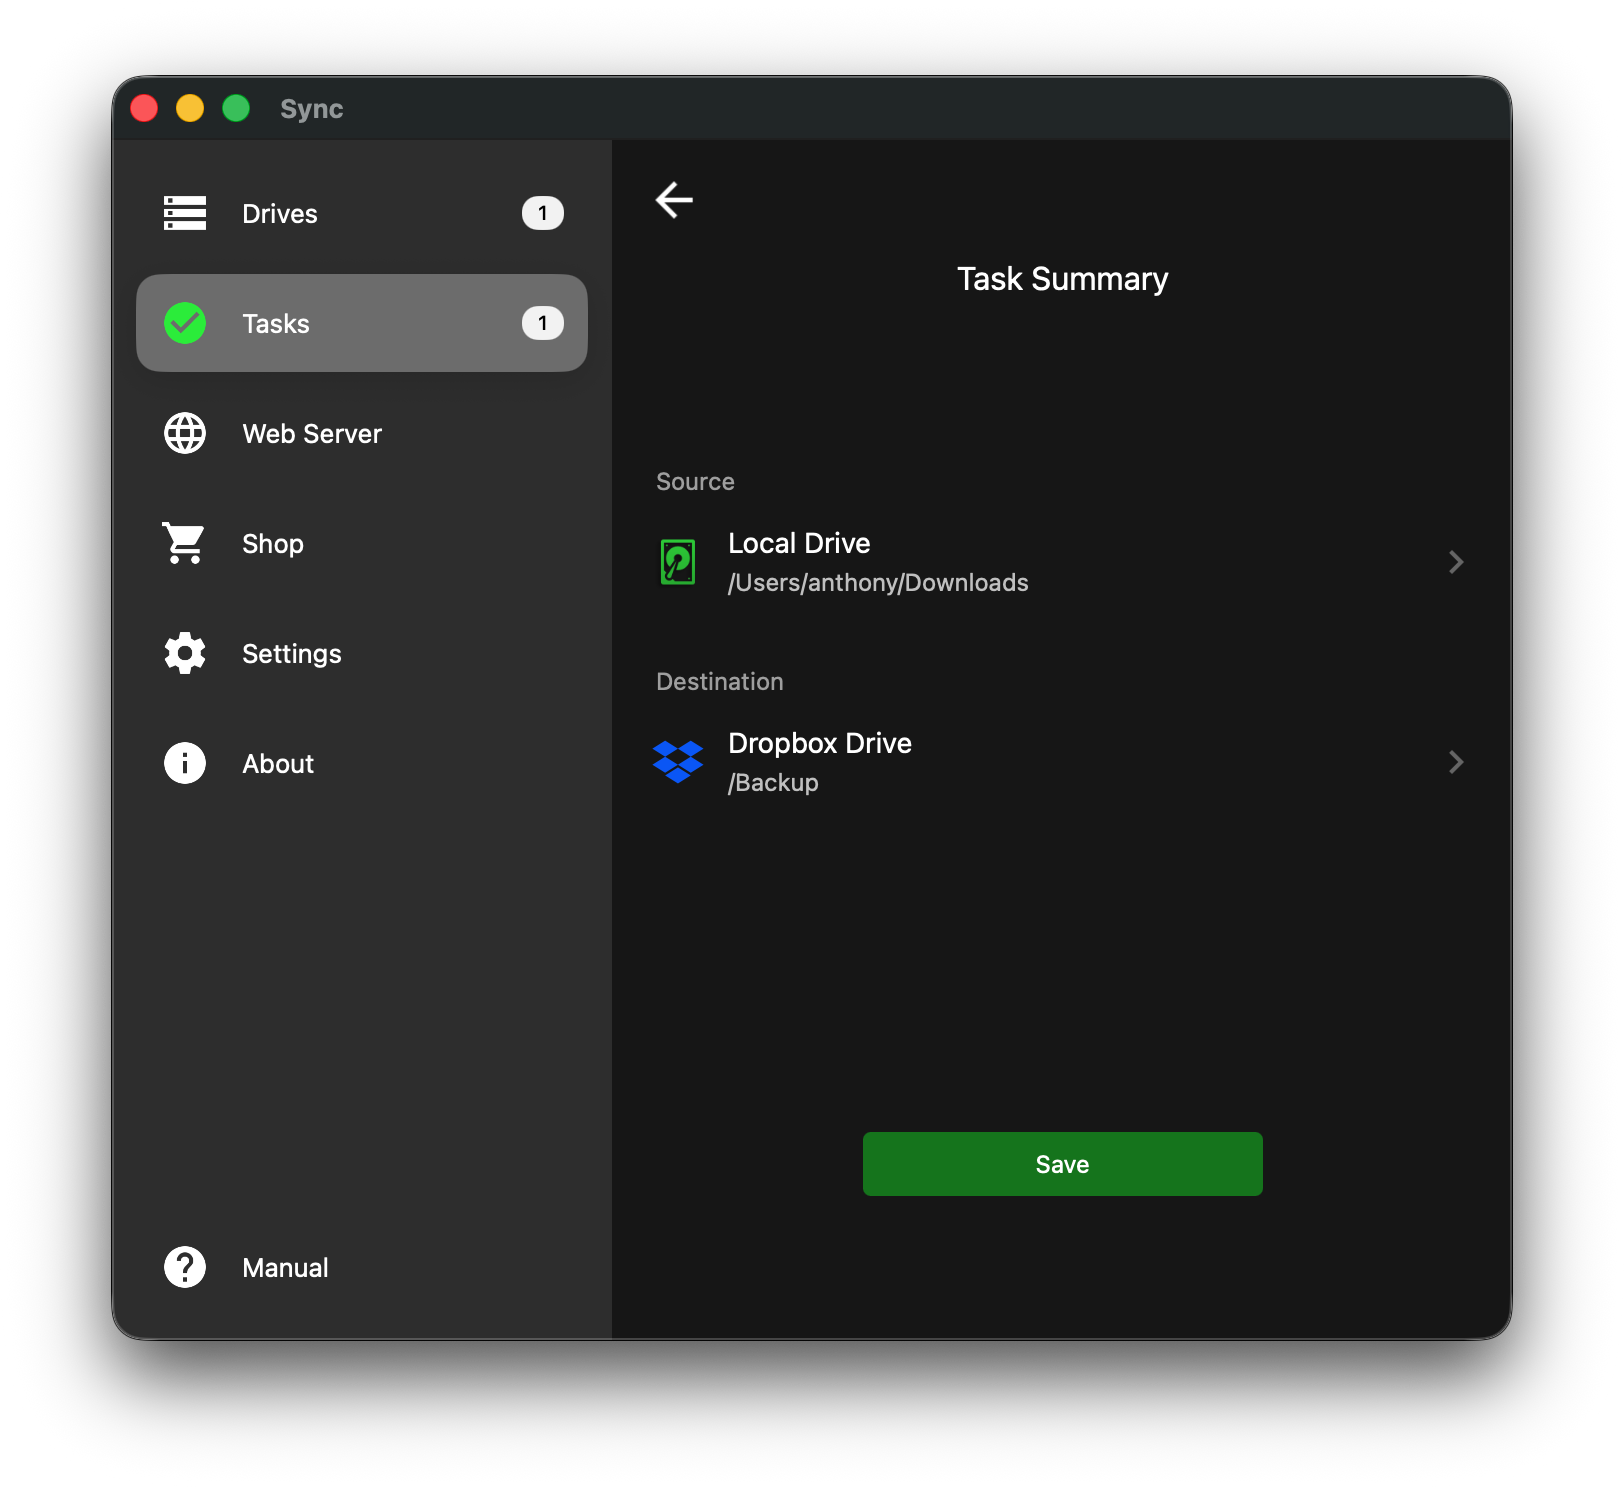
Step 7: Review and Save
- Review the Task Summary screen to ensure the paths are correct.
- Source: Should display your local path (e.g., /Users/username/Downloads).
- Destination: Should display your cloud path (e.g., Dropbox Drive /Backup).
- Click the green Save button at the bottom of the screen.
Reference: Image 7
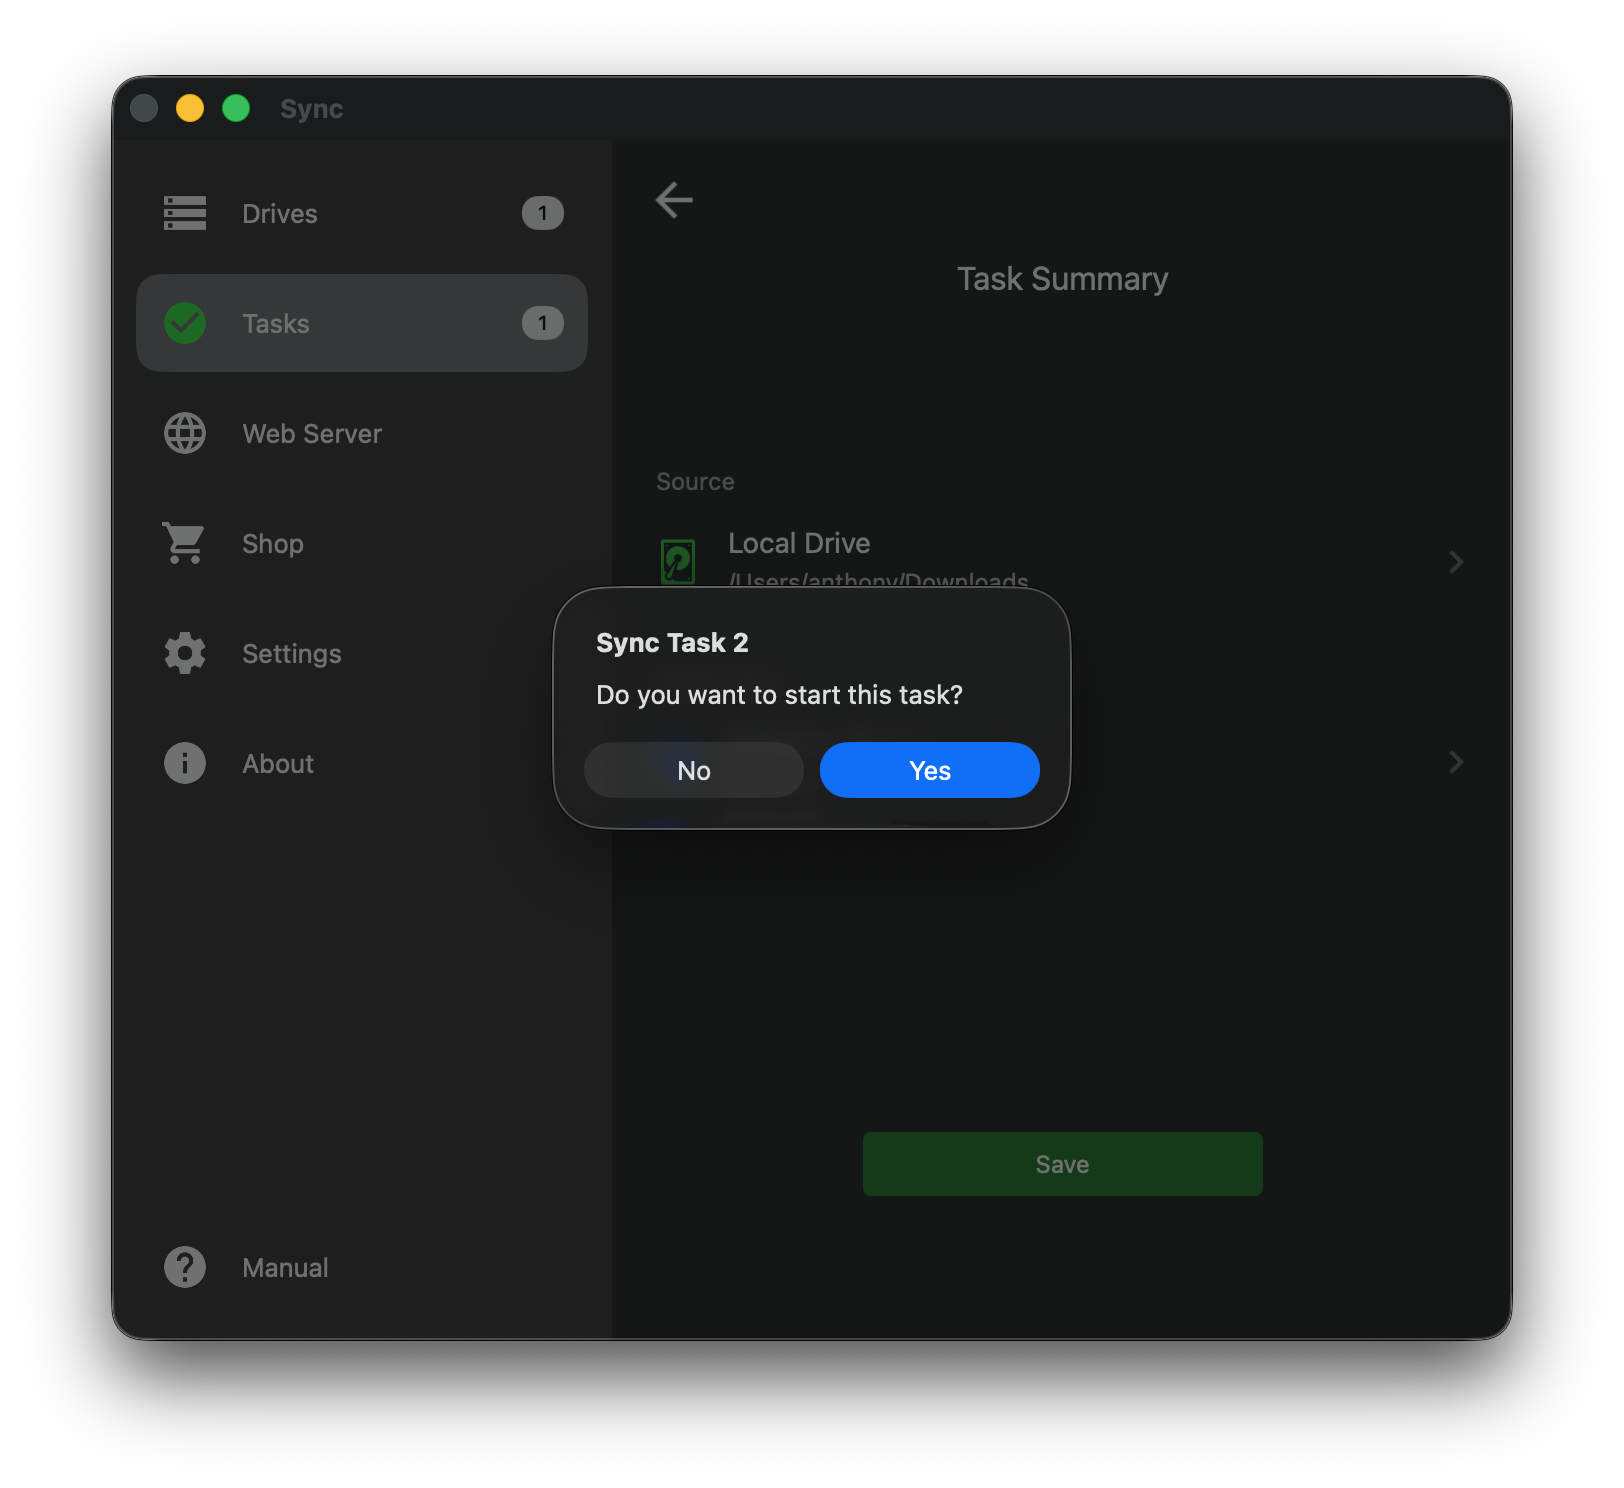
Step 8: Start the Task
Reference: Image 8
- A confirmation dialog will appear: "Do you want to start this task?"
- Click Yes to run the synchronization immediately.
- If you click "Yes", the task will be saved and started immediately.
- If you click "No", the task will be saved but will remain idle until you manually run it.
Reference: Image 8